Goland入门指南(使用Goland创建并运行项目)
上一节详细介绍了 Goland 的安装和破解,本节我们来介绍一下怎么使用 Goland 来创建并运行一个项目。
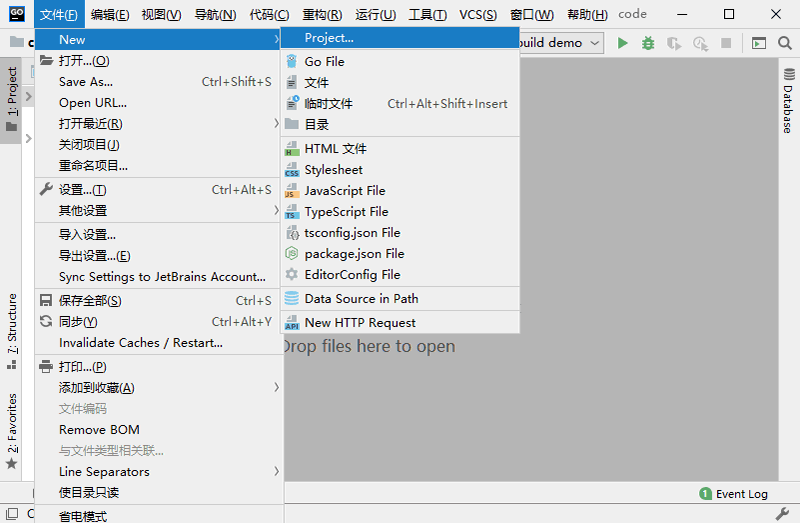
在菜单中选择新建项目
为项目选择一个目录(尽量选择空目录),并点击“Create”完成创建。

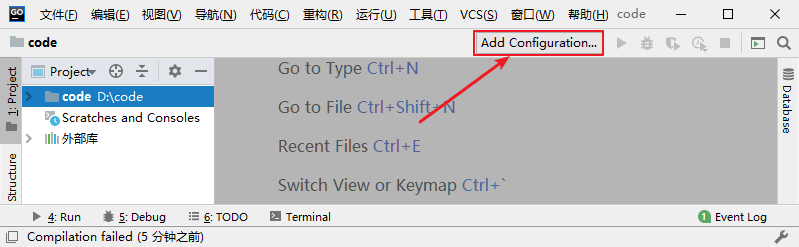
点击 Add Configuration
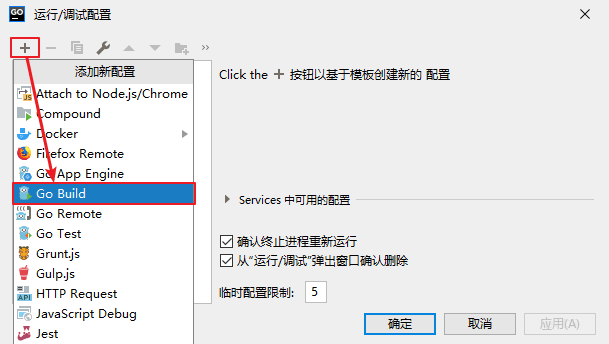
在弹出的窗口中点击“+”,并在下拉菜单中选择“Go Build”。
编辑配置信息
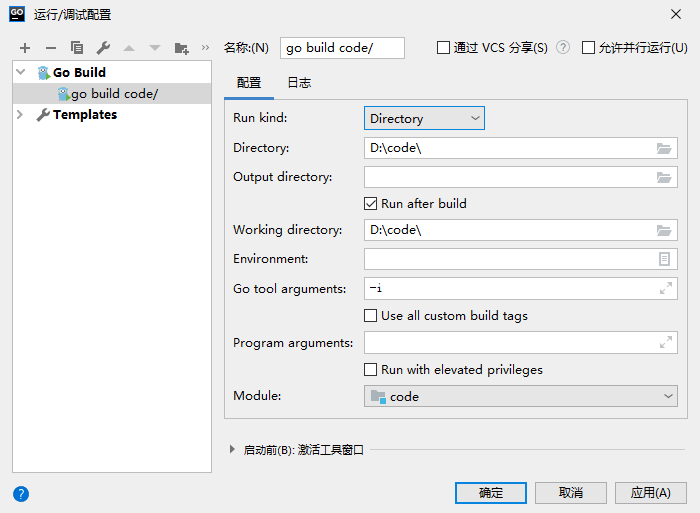
点击“Go Build”之后,在窗口中填写对应的信息,如下所示。
上图中有以下几点需要注意:
新建 Go 源文件
在新创建的 Go 源文件中写入如下代码。
编写测试代码
然后,我们就可以点击 Goland 右上方的绿色三角来运行上面编写的程序了。
运行程序
创建项目
首先,在“文件”菜单中找到“New”,并在下一级菜单中选择“Project”来创建一个新项目。在菜单中选择新建项目
为项目选择一个目录(尽量选择空目录),并点击“Create”完成创建。
创建项目
编辑运行/调试配置
每次创建项目之后,我们都需要对 Goland 进行一些配置,在 Goland 的右上方找到“Add Configuration”并单击。点击 Add Configuration
在弹出的窗口中点击“+”,并在下拉菜单中选择“Go Build”。
编辑配置信息
点击“Go Build”之后,在窗口中填写对应的信息,如下所示。
上图中有以下几点需要注意:
- 名称:为本条配置信息的名称,可以自定义,也可以使用系统默认的值;
- Run kind:这里需要设置为“Directory”;
- Directory:用来设置 main 包所在的目录,不能为空;
- Output directory:用来设置编译后生成的可执行文件的存放目录,可以为空,为空时默认不生成可执行文件;
- Working directory:用来设置程序的运行目录,可以与“Directory”的设置相同,但是不能为空。
提示:除了上面提到的几点外,其余的配置项使用系统的默认值即可,无需修改。
编写并运行代码
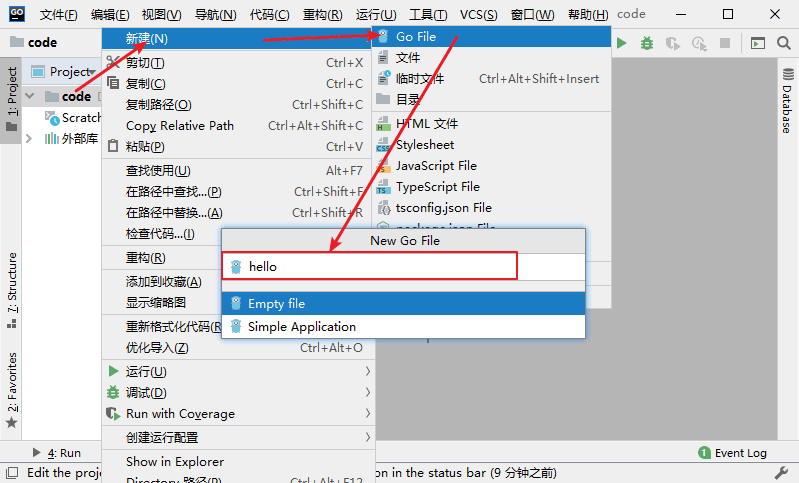
将 Goland 配置好后,就可以在项目文件夹下编写代码了。首先新建一个 Go 源文件,在项目文件夹上点击右键,然后在弹出的菜单中找到“新建”,并在下一级菜单中选择“Go File”,最后在弹出框中输入文件名(红框处)并选择“Empty file”,无误后按“Enter”键进行确认。新建 Go 源文件
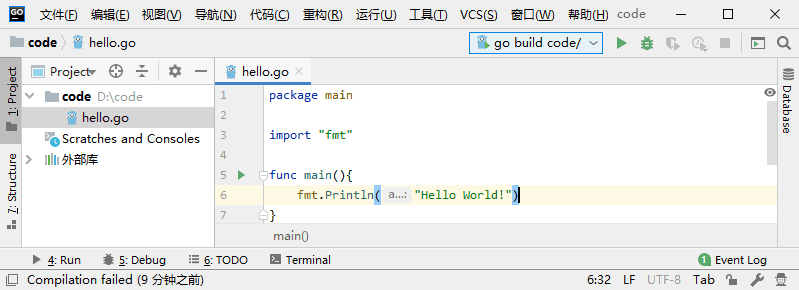
在新创建的 Go 源文件中写入如下代码。
编写测试代码
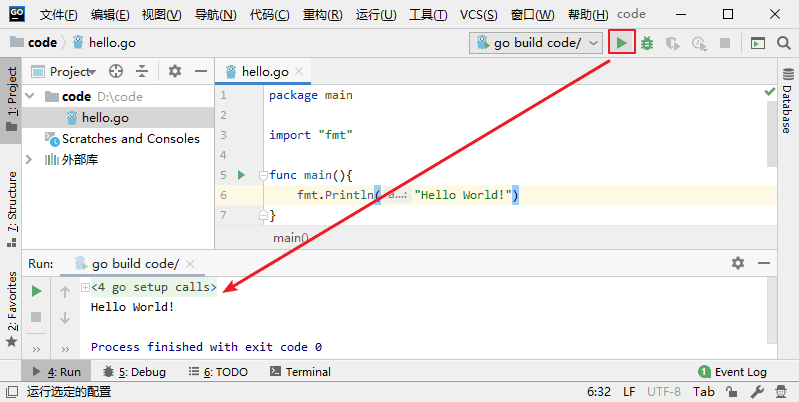
然后,我们就可以点击 Goland 右上方的绿色三角来运行上面编写的程序了。
运行程序
 ICP备案:
 公安联网备案: